Hello, I’m willow fish.^^ In this posting, we will introduce free video editing program video encoding and how to improve image quality by reducing video capacity.
There are various video editing programs, but the use of the film I used is easy and even beginners can use it easily. In my case, I am not a frequent editor, and I know many functions, but I can easily do some of the functions I often use through the film.
[Free video editing program FILMORA] For beginners and professionals, Filmora, a free video editing program, is an easy-to-use video editing machine for beginners. The best YouTube video editing machine picked by overseas creators!bit.ly

If you haven’t already installed Filmora, click the link above to download and install it free of charge from the official website.
Recently, I watch various videos on YouTube and sns. So many people make their own videos and upload them on social media. First, you have to encode the video before you upload it is uploaded. Encoding goes through the process of compressing to reduce the video capacity. This reduced video can be played smoothly on the mobile.
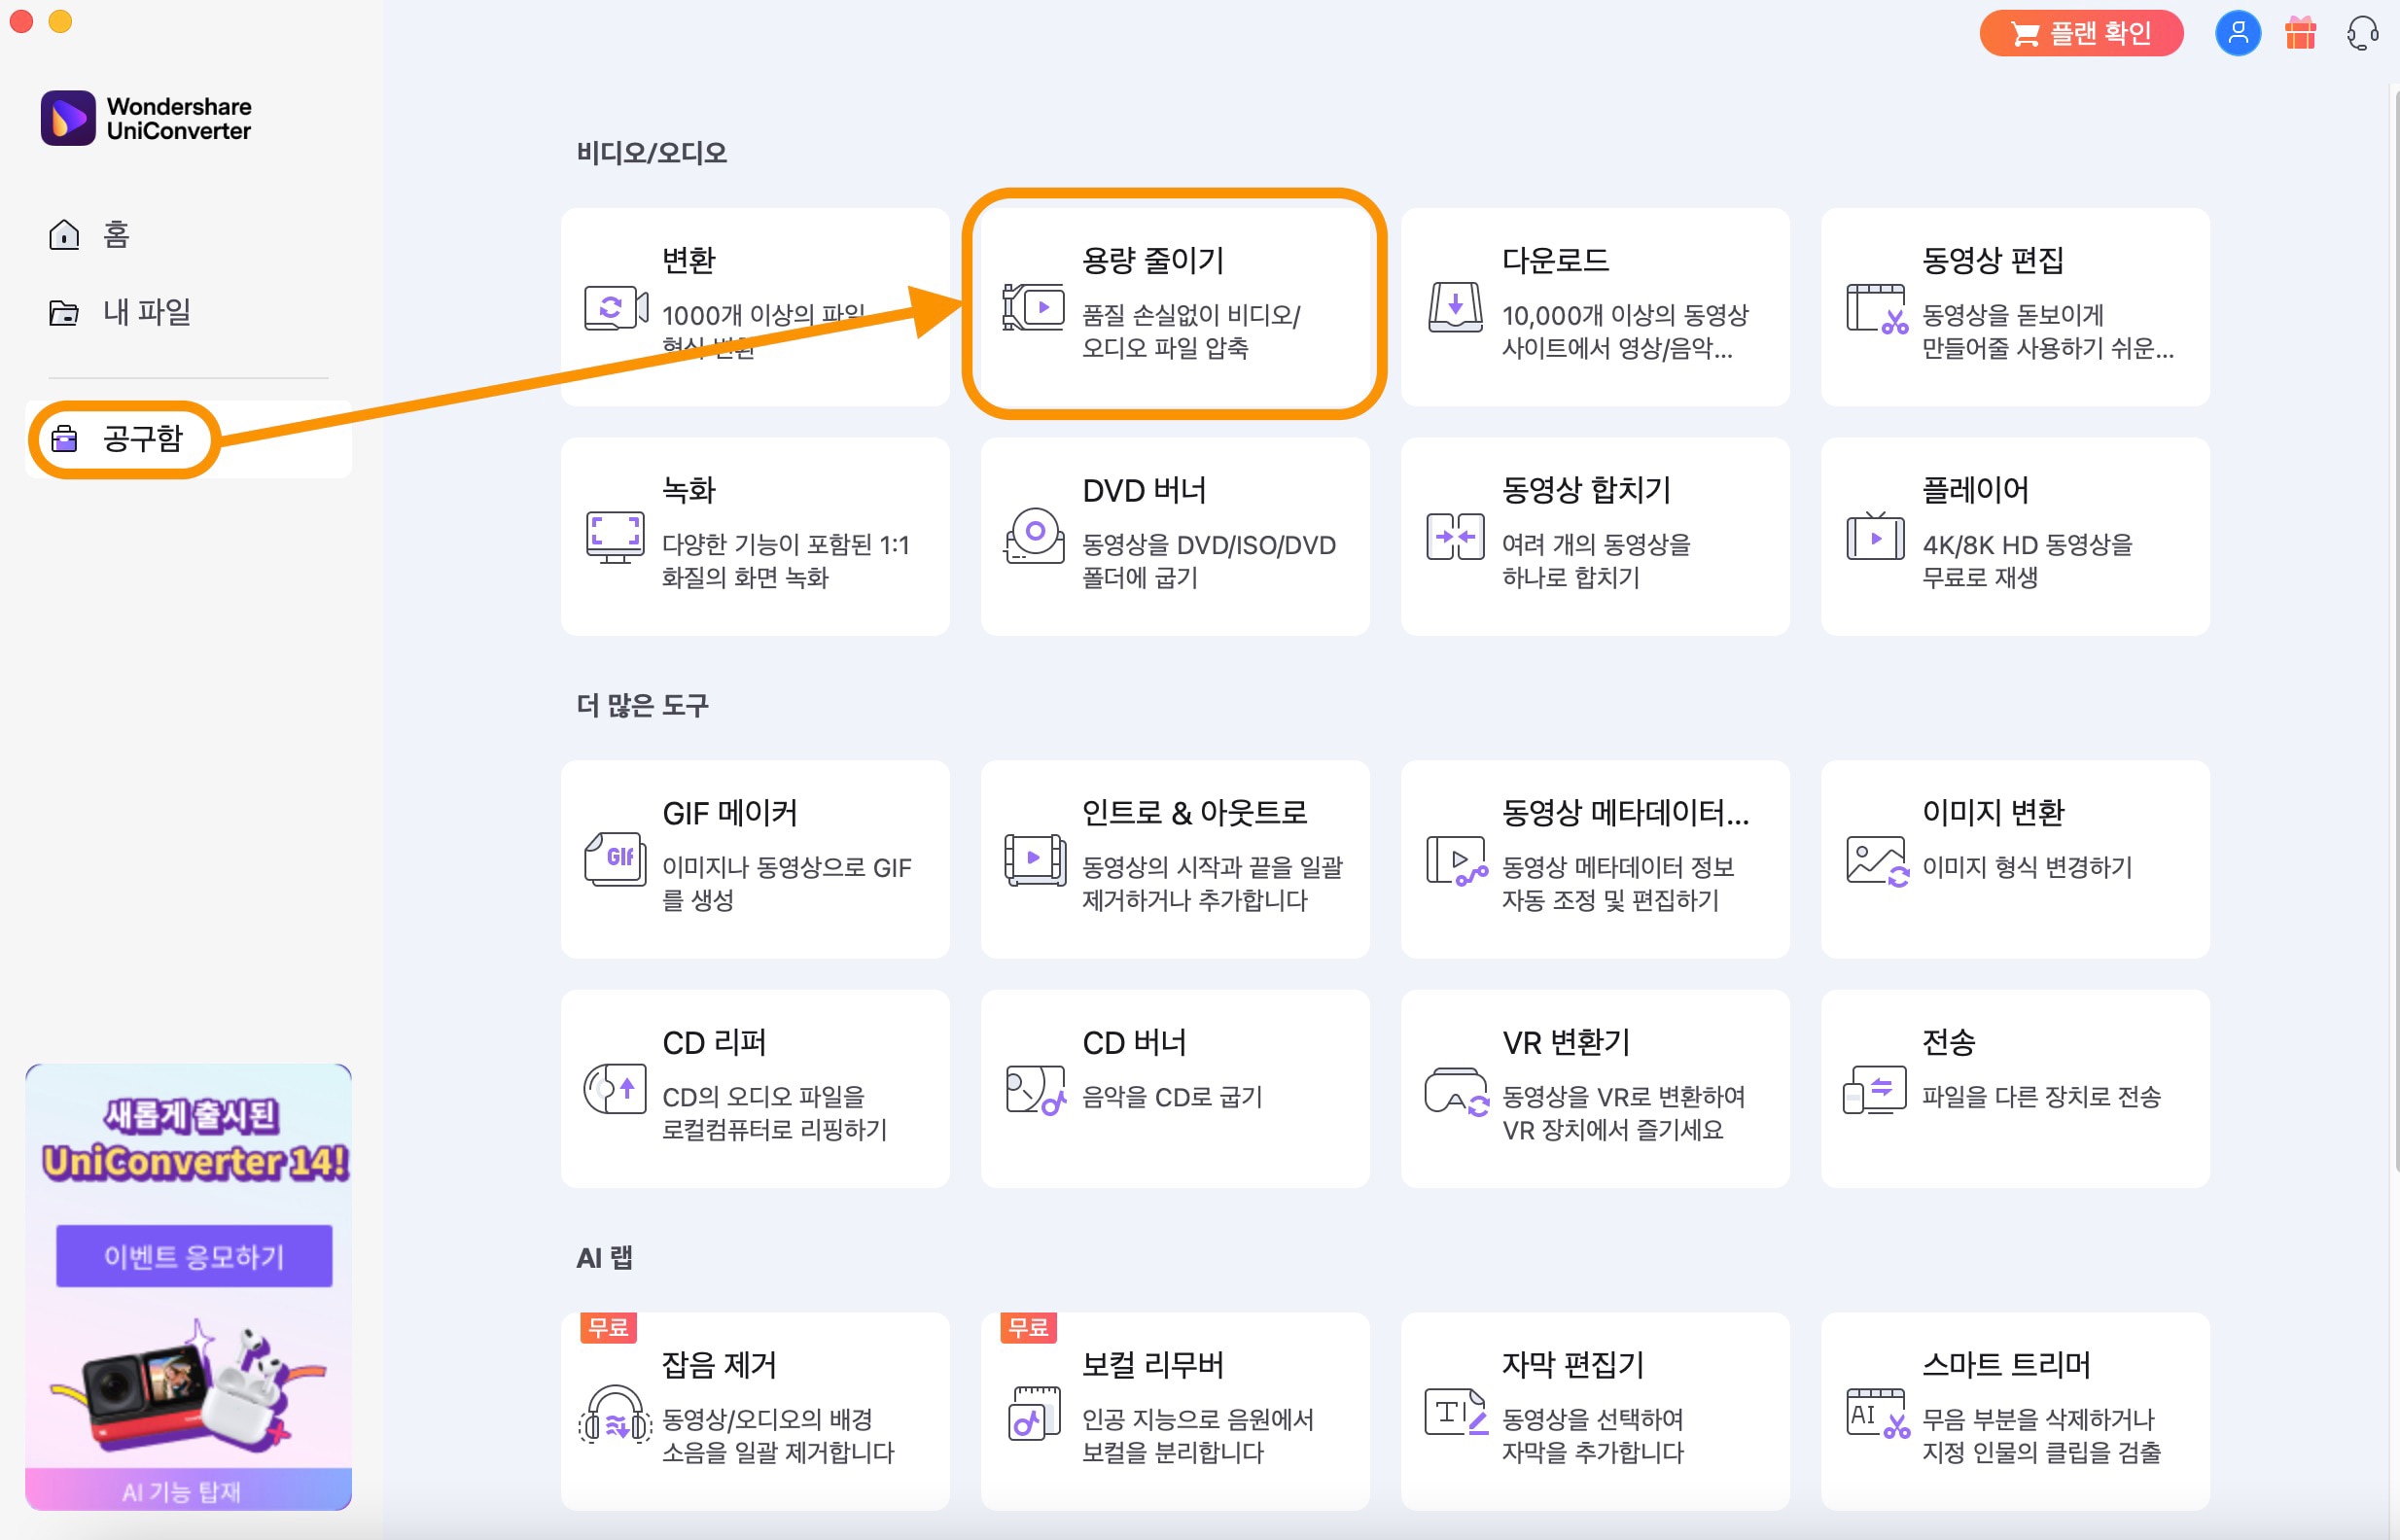
So, first, I will explain how to encode a video.Running the free video editing program opens the main screen above.

Click the Add File tab to import the image you want to encode through media import. You can also retrieve it through the shortcut key Ctrl-I. By the way, if you work with the free version, you will get a watermark on the results. If you like it while using it, purchase a license to remove the watermark.
Below is the timeline panel. Drag the imported image with your mouse to position it in the timeline area at the bottom.

The first way to reduce video capacity is to remove unnecessary parts of the video. If you use the shape of the scissors to perform the split work, and then press the Delete key in the relevant area to delete only the relevant part, the capacity will decrease.
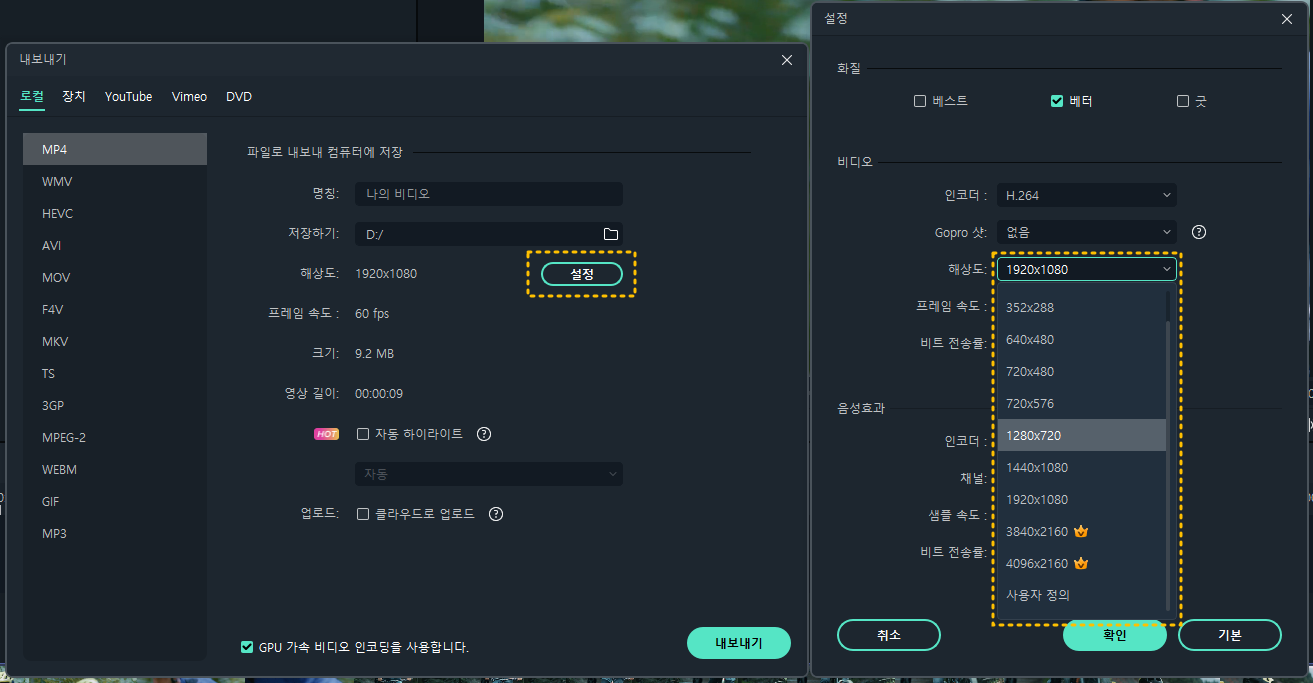
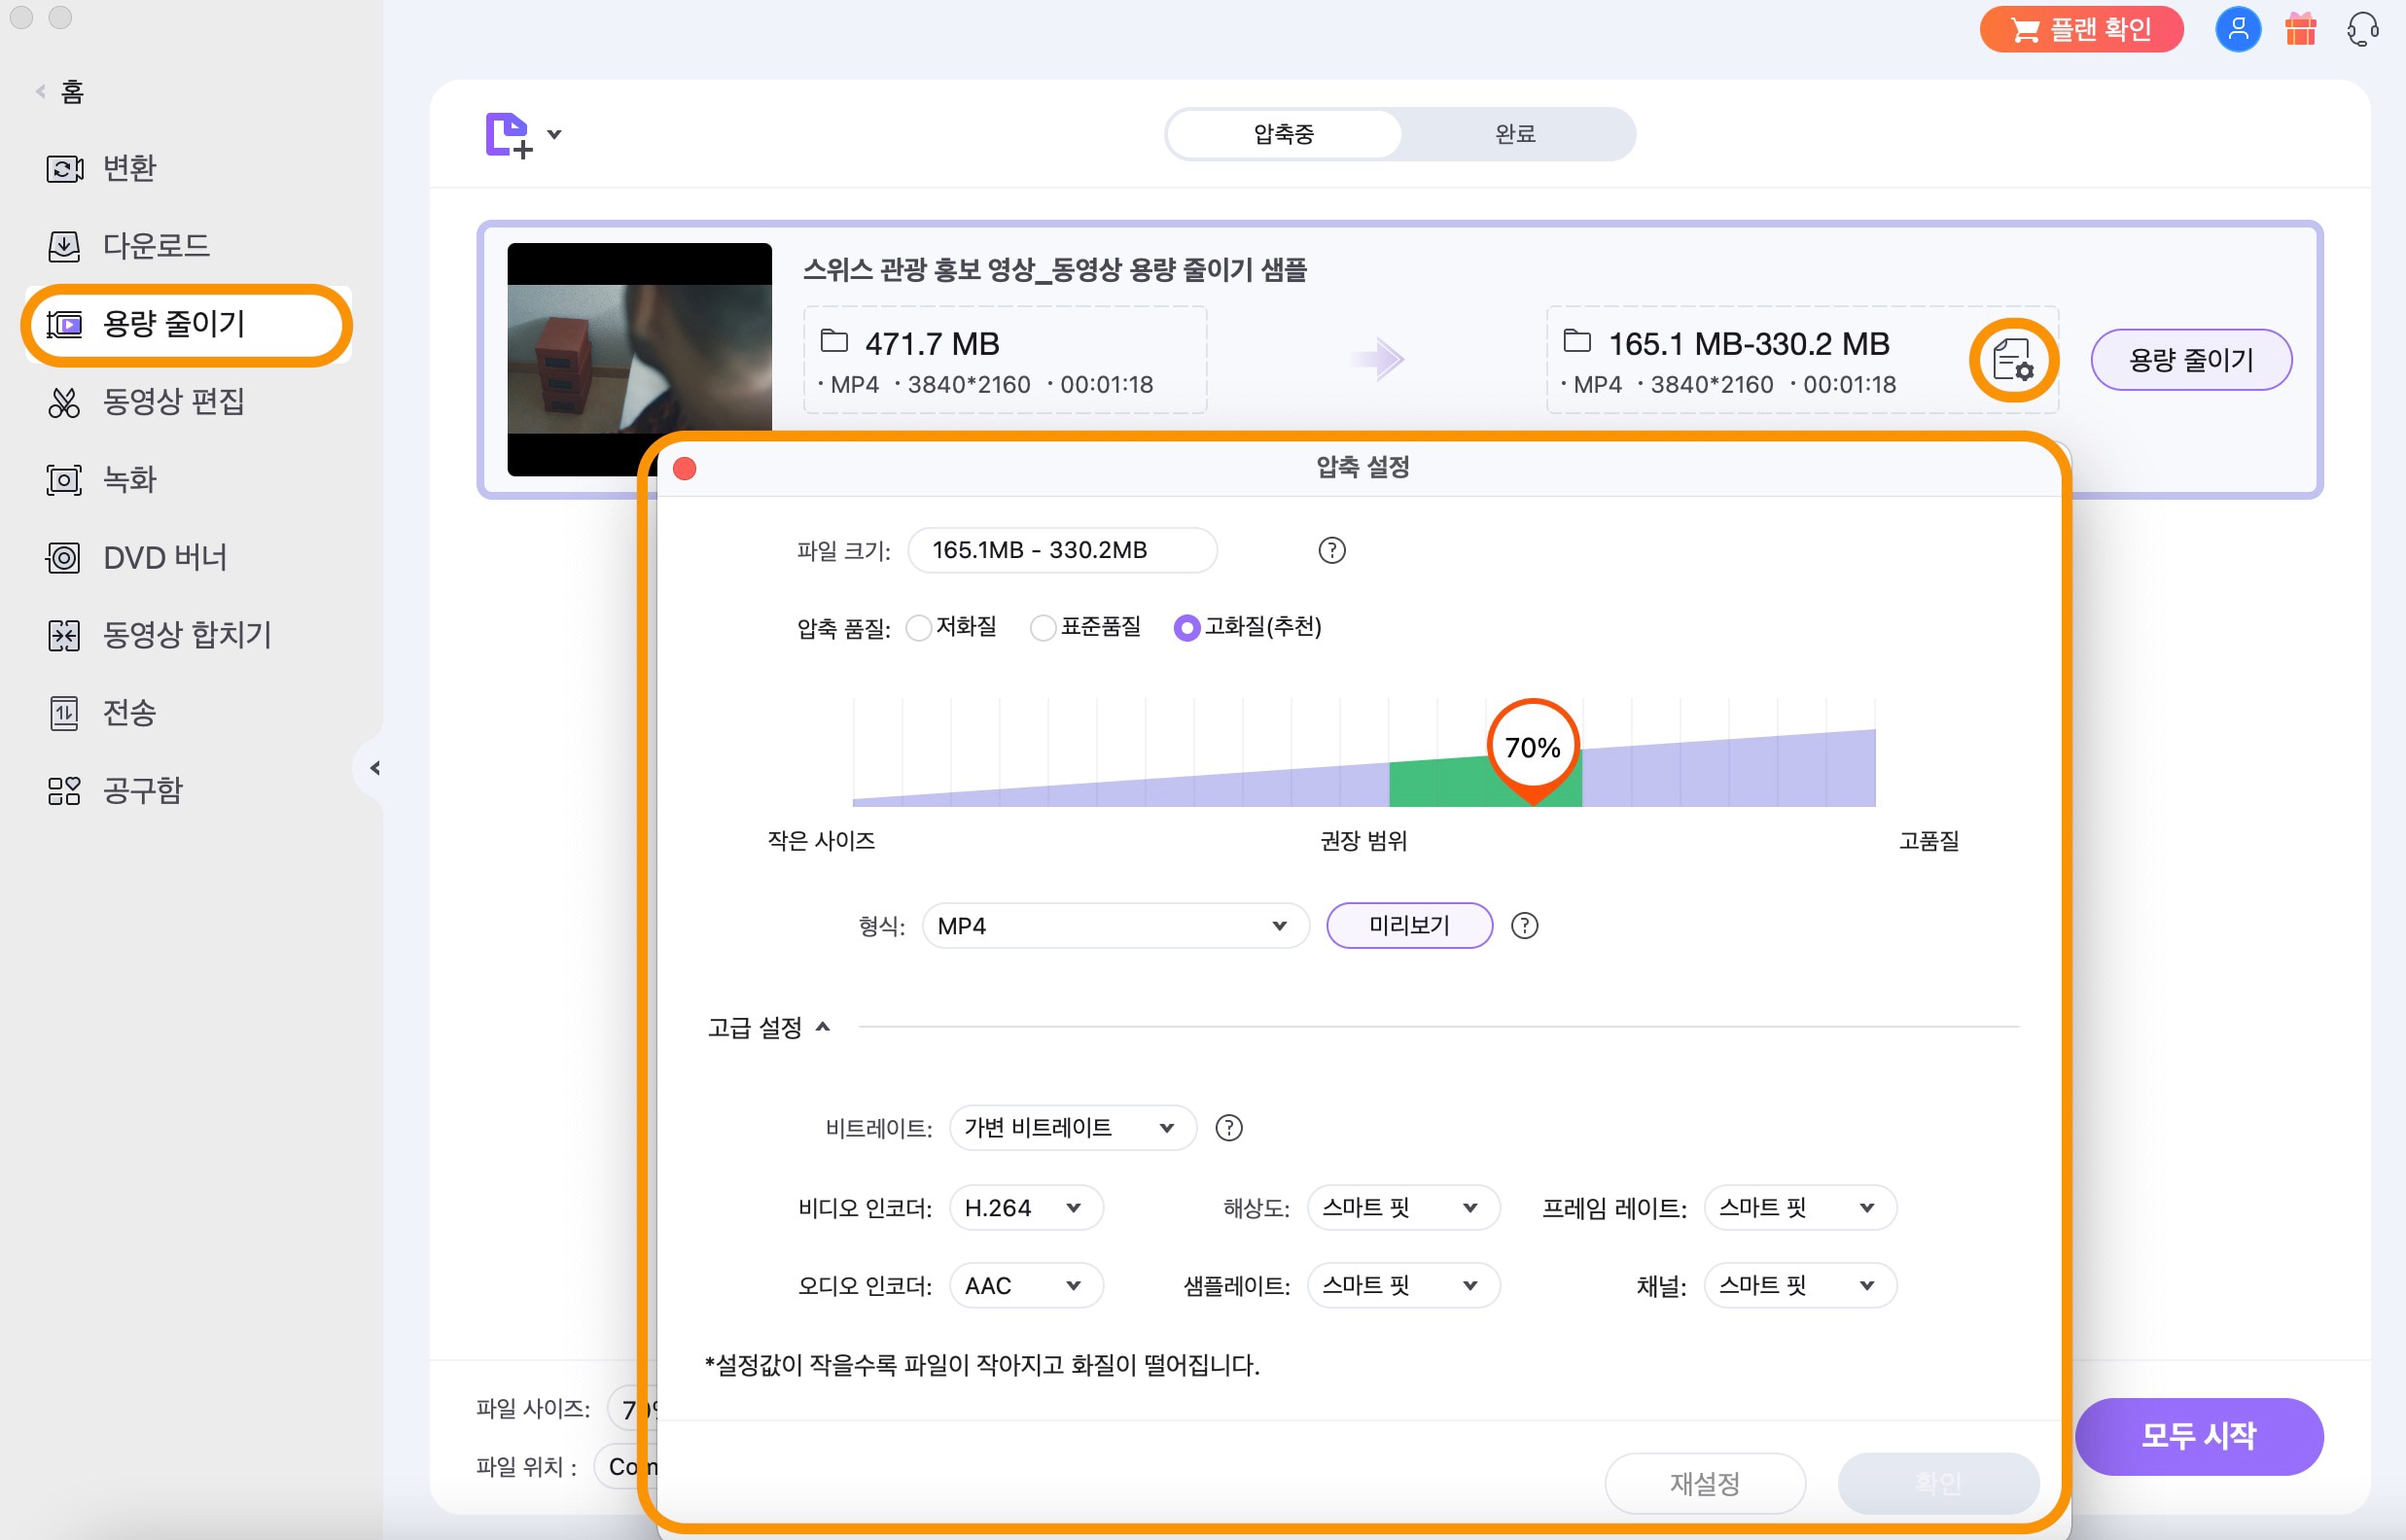
#Reduce video capacity You can also reduce video capacity through video encoding.Press the Export button on the top menu of the free video editing program to open the export screen for the selected range. You can now select MP4 on the left and click the Settings button to adjust the value.

The settings screen allows you to reduce video quality, video, and audio settings. After setting it to the desired value, press the confirmation button to confirm that the file size is smaller than the original file. After setting it to the default, I tried video encoding and found that the capacity was reduced by about half.

This time, let’s take a look at how to improve the image quality of the video.There are four ways I can introduce you. There are the first automatic improvement function, the second lens correction function, the third stabilization function, and the fourth high quality method for storing videos. First, read the image and drag it to the timeline area below.Double-click the clip inserted into the timeline to open the Video tab in the upper left corner. Check the “Automatic Improvement” item at the bottom of the Video tab > Basic menu. Then click the arrow next to the check box to create a slide bar where you can adjust the quantity as shown on the top screen.You can adjust the quantity from 0 to 100. Adjusting the quantity adjusts the contrast strength. Previews in the right pane allow you to see the results of your work immediately. Auto-improvement is a feature that adjusts the contrast to compensate for the color of the video so that it can be seen clearly.On the left is the image quality when the quantity is zero. On the right is the result that you can see in the preview window when you set the quantity to 100. What do you think? It’s easy to see that the video quality has improved when the quantity is set to 100, right? Please adjust the contrast you want and save the video you want.# We will improve the video quality through the video editing program and lens correction.Check the lens correction in the Video tab > Basic menu. Then, you will see a screen where you can select the model profile and resolution as shown above.Lens correction allows you to correct camera lens distortion to some extent as a later occupation. To do this, you need to know the camera model you took. “If you select the “”Model”” item, various camera models will appear, but please select the camera model that suits you.” If you adjust the level, you can see that the strength of the lens correction changes.This time, let’s look at one of the functions of the video editing program, the stabilization function.Free Video Editing Program Filmorra Video Tab > Check the Stabilization section of the basic menu to see a screen with a red square box. The camera may shake due to the shaking of the hand during the shooting. The function of correcting this kind of tremor is stabilization. When this function is turned on, the film will analyze the video and automatically correct it.Adjusting the smooth level allows you to see the reflected result values on the preview screen. Please adjust it to the desired level in the preview. And the peripheral processing can be “reflective”, “none”, “tile”, and “extended”, but please set it to the appropriate value for your situation.# Video editing This is a way to improve video quality by saving video quality to high quality at the quality.Press the Export button at the top of the free Filmola video editing program for encoding and the Export pop-up window will open as shown above. Click the Settings button here.It’s important here. Please make sure that you check the image quality best on the configuration screen.You can set the image quality to one of the three options: Best, Better, or Good. Also check if it is selected at higher resolution. Then you need to press OK to save it. If you don’t choose the best, you can reduce the video capacity, but it doesn’t improve the image quality.And if you change the settings before loading the video through the free video editing program Filmorra, it will help improve the image quality. First, click the File menu at the top of the program, and then click Project Settings.And if you change the settings before loading the video through the free video editing program Filmorra, it will help improve the image quality. First, click the File menu at the top of the program, and then click Project Settings.